Tutorial
This tutorial will guide as a quick-start from creating a django-project up to the first page with django-neon.
Tip: The first step should be to set up a virtual environment. In Python 3 this can be done with the pyvenv script. Also conda from Continuum Analytics is a very helpful tool for managing environments.
Create a project
Once django and django-neon are installed a new project can get created with the $ django-admin.py startproject myproject command, where myproject is the project name. This will create a new folder with the project name. After adding the additional folders db, media, static, static-dev and templates the directory should now have the following structure:
myproject/
    db/
    manage.py
    media/
    myproject/
        __init__.py
        settings.py
        urls.py
        wsgi.py
    static/
    static-dev/
    templates/
The db directory is optional but a good place to store a SQLite database file. The media directory is used for storing user-uploaded files and the static-dev directory for holding assets like css, javascript or images. The static directory should kept empty and populated by the collectstatic command before deployment. All this is explained in the django-documentation but the startproject command does not create these directories.
The directory templates is for convenience. django searches for templates in a templates directory included in applications, and this is a good place to store default templates for individual applications. But for large projects it's more convenient to have all templates organized in one place.
Configure a project
Configure the settings.py and urls.py files from the myproject directory. In the settings.py file add django_neon to the list of installed apps:
INSTALLED_APPS = [
    ...
    'django_neon',
]
and include the 'neon.urls' file into urls.py file:
from django.conf.urls import include, url
from django.contrib import admin
from django_neon.views import HomePageView

urlpatterns = [
    url(r'^admin/', admin.site.urls),
    url(r'^page/', include('django_neon.urls')),
    url(r'^$',
        HomePageView.as_view(),
        name='neonhome'),
]
Note: Convenient for development is the serving of static files from the django development-server. To configure this just import settings and static and append the handlers for serving files from STATIC_ROOT and MEDIA_ROOT to the urlpatterns:
from django.conf import settings
from django.conf.urls.static import static
...
urlpatterns += static(settings.STATIC_URL, document_root=settings.STATIC_ROOT)
urlpatterns += static(settings.MEDIA_URL, document_root=settings.MEDIA_ROOT)
To get this work the corresponding settings must be defined. So head again to the settings.py file, find the STATIC_URL = '/static/' line and extend the settings:
STATIC_URL = '/static/'
# where collectstatic moves the files to deploy:
STATIC_ROOT = os.path.join(BASE_DIR, 'static')
# where collectstatic searches for the files to deploy:
STATICFILES_DIRS = (
    os.path.join(BASE_DIR, 'static_dev'),
)

MEDIA_URL = '/media/'
MEDIA_ROOT = os.path.join(BASE_DIR, 'media')
Initialize the database
django works with a couple of relational databases. Python comes with SQLite3 included and django works with SQLite3 out of the box. To learn how to set up the database refer to the database settings of the django documentation.
Then, to initialize the database run the commands:
$ python manage.py migrate
$ python manage.py createsuperuser
These commands create the tables and a user to login at the django admin-backend.
Tip: As the django ORM describes itself as database-agnostic, databases differ and one may run into problems transfering data between different databases or because of some specific behaviour concerning the application. So right from the start it's best to use the same database-system for development as for production.
Create a first page
Let's start the development server with
$ python manage.py runserver
and open the browser at localhost:8000:
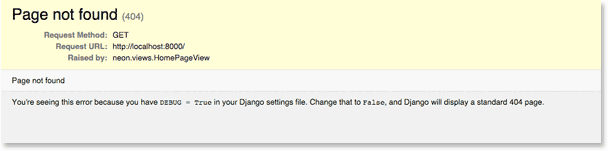
django will show an error-message because there is nothing to display so far.
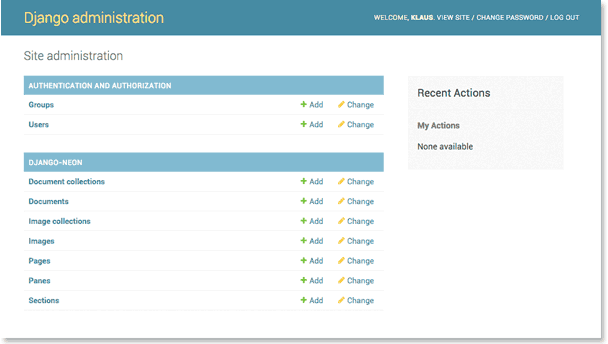
Let's login to the admin-backend with the superuser data at localhost:8000/admin
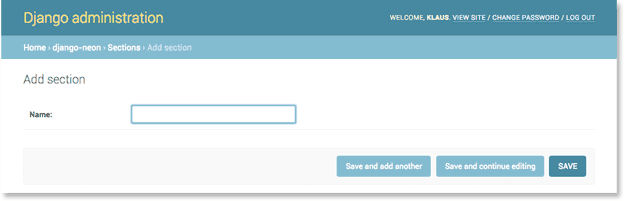
and open the page-add-form by clicking on 'page +add':
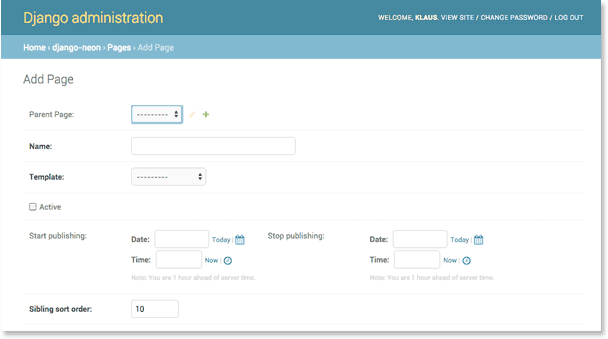
Keep the field Parent Page empty and give the page a name, i.e. 'Home'. Every page must have a template for rendering. As long as no custom templates are configured the only choice is 'neon_base.html'. Choose this option, click on Active and save the page.
Going back to localhost:8000 will render something like this:
![]()
Create a pane
Now add some content by creating a pane. In the admin-backend klick on 'pane +add' to get to the according form:
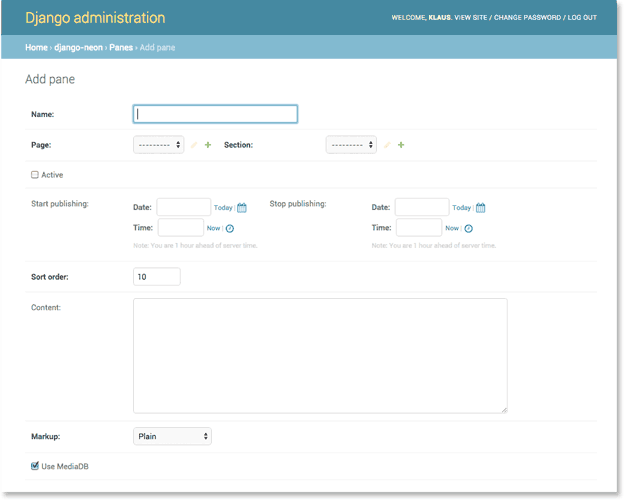
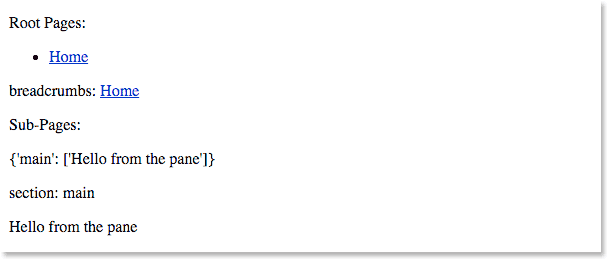
Give the pane a name and choose a Page the pane belongs to. So far there is just one page Home. Every pane must also refer to a Section. To create a section click on the + sign to the right of the selection.
A Section is just a name for organizing multiple panes on a single page. Enter the name 'main' here and click on save to go back to the pane-form. On the pane click on Activate and enter some text in the Content filed, i.e 'Hello from the pane'. Reloading localhost:8000 now will show the content from the pane.
Feel free to play around with additional pages, panes and sections.
templates
The template in use is stored under 'django_neon/templates/django_neon/neon_base.html'. This template can be used as a base-template with {% extends 'django_neon/neon_base.html' %} as first row in derived custom templates. But this is not a must, so start with a new template and store this file in the templates directory as base.html:
<!DOCTYPE html>
<html lang="en">
<head>
    <meta charset="utf-8" />
    <title>Test</title>
</head>
<body>
    {% for content in sections.main %}
        <div>
            {{ content }}
        </div>
    {% endfor %}
</body>
</html>
To render this template the settings.py have to modified, so that django-neon knows about this template and django can find it. For the latter add os.path.join(BASE_DIR, 'templates') to the TEMPLATES list
TEMPLATES = [
    {
        ...
        'DIRS': [os.path.join(BASE_DIR, 'templates')],
        ...
and for the former set up a new list with the templates django-neon should know about:
# django-neon settings:
NEON_TEMPLATE_NAMES = [
    'base.html',
]
Once the setting NEON_TEMPLATE_NAMES is defined django-neon will no longer list 'neon_base.html' as an option for templates.
This example also shows, how Section works: django renders data from a Context. This is a dictionary-like object which holds data that can be accessed from a template with the {{ data_name }} syntax. django-neon stores a dictionary with the name sections in the context. The keys are the names of the Sections and the corresponding values are lists of panes. The above example iterates over the content of all panes (of a given page) referring to the 'main'-section.
See the documentation about Templates for more details.